Repair Case Studies
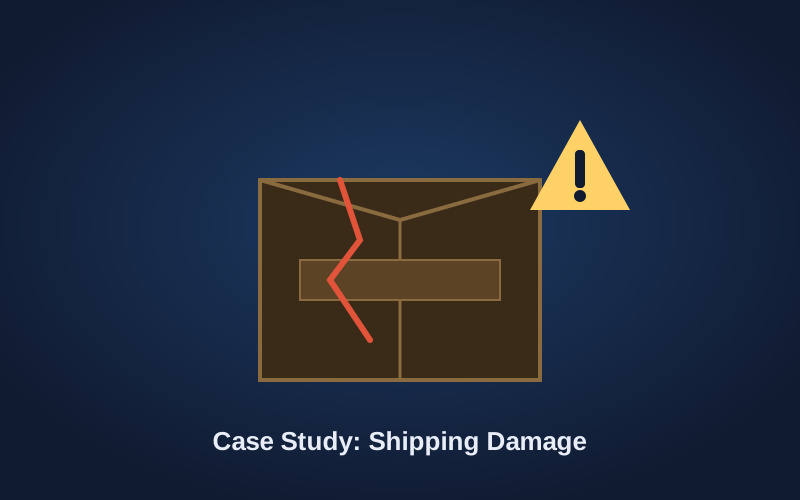
Case Study: Recovering a Gaming PC After Shipping Damage
The Problem
A client purchased a high-end gaming PC online and had it shipped directly to their home. Upon powering it on for the first time, the system booted but displayed no video output, and the case emitted an intermittent rattling sound when moved.
Diagnosis
Opening the case revealed the graphics card had shifted significantly during transit — the original packaging hadn't adequately secured the card against its included support bracket, and rough handling in shipping had caused it to partially dislodge from the PCIe slot. Closer inspection showed:
- The GPU's PCIe connector was partially disengaged from the motherboard slot.
- One of the card's power connector cables had come loose.
- A support bracket screw had sheared off inside the case, which was the source of the rattling.
No visible damage to the PCB or components themselves — the issue was purely a seating and connection problem caused by movement during shipping.
Repair Process
- Fully powered down and disconnected the system, then removed the graphics card entirely to inspect for physical damage.
- Located and removed the sheared screw fragment from inside the case.
- Reseated the GPU firmly into the PCIe slot, confirming an audible and tactile click.
- Reconnected the power cables to the card, double-checking each connection.
- Reinforced the card's mounting bracket with a replacement screw and confirmed the card was fully secured against future movement.
- Powered the system on and confirmed stable video output.
- Ran an extended stress test (2+ hours) to confirm stability under load, monitoring temperatures and checking for any artifacts or crashes.
Final Outcome
The system passed all stress testing with stable temperatures and no display issues. The client was walked through how to check GPU seating themselves in the future, and given packing recommendations for any future shipping needs.
Turnaround time: Same day.
Have a system that arrived damaged? Home Net Computers inspects and repairs shipping-related damage for clients throughout the Greater Seattle Area. Call 206-478-5001 or reach out through our contact form.
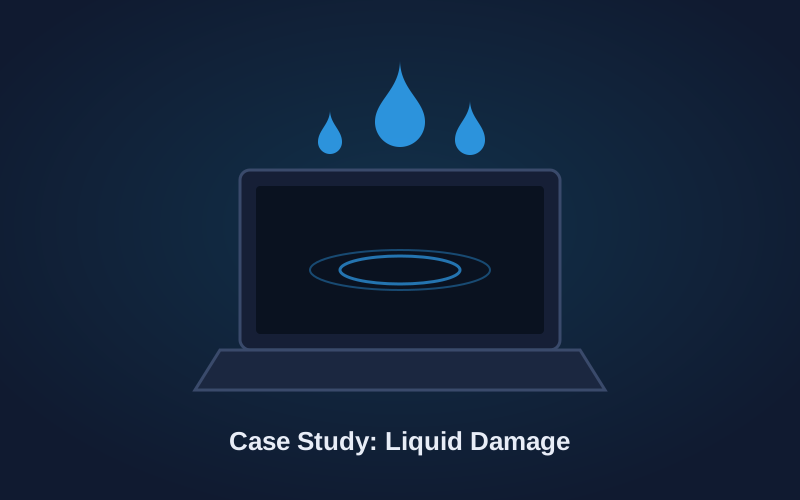
Case Study: Laptop Recovery After Liquid Spill
The Problem
A client spilled a glass of water directly onto their laptop keyboard while it was powered on. The laptop shut off immediately, and several keys stopped responding entirely when the client attempted to power it back on the next day.
Diagnosis
Because the client made the mistake of trying to power the laptop back on before it had fully dried, further investigation was needed to assess the extent of the damage. Disassembly revealed:
- Corrosion beginning to form on portions of the keyboard's ribbon connector.
- Minor liquid residue near the edge of the motherboard, close to the keyboard connector header.
- The battery, storage drive, and RAM appeared undamaged and outside the direct path of the spill.
The good news: because the spill was water (not a sugary or conductive liquid) and the affected area was contained mostly to the keyboard assembly, the core motherboard components were largely spared.
Repair Process
- Fully disassembled the laptop to separate all components from the affected area.
- Cleaned corrosion from the keyboard ribbon connector and surrounding contacts using isopropyl alcohol and specialized cleaning tools.
- Inspected the motherboard closely under magnification for any further corrosion or damage near connector pins.
- Allowed all components to fully dry before any reassembly or power testing.
- Tested the motherboard independently (without the keyboard) to confirm it powered on and ran normally.
- Replaced the keyboard assembly, since the ribbon cable and several keys had sustained damage beyond reliable repair.
- Reassembled the system and ran extended testing to confirm full functionality, including all ports, the trackpad, and speakers.
Final Outcome
The laptop was fully restored with a new keyboard assembly, and all data on the drive was confirmed intact and accessible — no data recovery was needed since the storage drive itself was undamaged. The client was advised on immediate steps to take if a spill happens again (power off immediately, do not attempt to power back on, bring in as soon as possible).
Turnaround time: 3 business days (pending keyboard assembly part arrival).
Spilled something on your laptop? Time matters — power it off immediately and don't try turning it back on. Home Net Computers handles liquid damage assessment and repair for clients throughout the Greater Seattle Area. Call 206-478-5001 or reach out through our contact form right away.
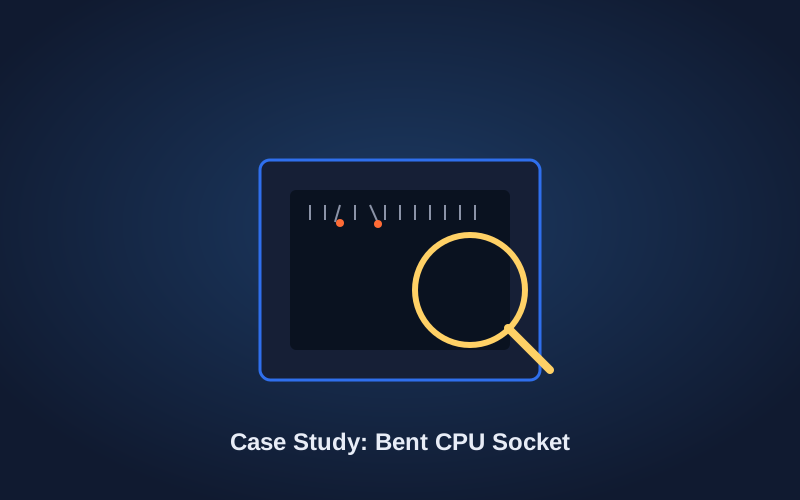
Case Study: Repairing a Bent CPU Socket Pin
The Problem
A client attempting a DIY CPU upgrade contacted us after their system failed to boot post-installation — no display output, and the motherboard's diagnostic LED indicated a CPU-related error. The client mentioned the processor "didn't seat as smoothly as expected" during installation.
Diagnosis
Visual inspection of the motherboard's CPU socket under magnification revealed several bent pins near one corner of the socket — a common result of a CPU being seated at a slight angle or with uneven pressure during installation. Modern CPU sockets have extremely fine, closely spaced pins, making this one of the more delicate repairs in PC hardware.
Further testing confirmed:
- Approximately six pins were visibly bent, ranging from minor to moderate deflection.
- No pins appeared to be broken off entirely, which meant repair was possible rather than requiring a full motherboard replacement.
- The CPU itself tested as undamaged once installed in a different, known-good motherboard.
Repair Process
- Carefully examined the socket under high magnification to map out exactly which pins were bent and in what direction.
- Using fine precision tools designed for this exact purpose, gently and gradually realigned each bent pin back to its original position — working slowly to avoid snapping any pins, which would have made the motherboard unrecoverable.
- Re-inspected the socket under magnification after each adjustment to confirm proper alignment before moving to the next pin.
- Once all pins were realigned, carefully reseated the CPU, confirming smooth, even contact with no resistance.
- Powered on the system and confirmed successful POST (power-on self-test) and display output.
- Ran extended stress testing to confirm stable performance under load with no errors related to CPU communication.
Final Outcome
The motherboard was fully restored without needing replacement, saving the client a significant cost compared to buying a new board. The system has run reliably since the repair. We also walked the client through proper CPU seating technique for any future upgrades.
Turnaround time: 2 business days.
Bent a pin during a CPU installation? Don't try to force it — bent socket pins require careful, precise correction. Home Net Computers repairs bent CPU sockets for clients throughout the Greater Seattle Area. Call 206-478-5001 or reach out through our contact form.
Case Study: Recovering a Gaming PC After Shipping Damage
The Problem
A client purchased a high-end gaming PC online and had it shipped directly to their home. Upon powering it on for the first time, the system booted but displayed no video output, and the case emitted an intermittent rattling sound when moved.
Diagnosis
Opening the case revealed the graphics card had shifted significantly during transit — the original packaging hadn't adequately secured the card against its included support bracket, and rough handling in shipping had caused it to partially dislodge from the PCIe slot. Closer inspection showed:
- The GPU's PCIe connector was partially disengaged from the motherboard slot.
- One of the card's power connector cables had come loose.
- A support bracket screw had sheared off inside the case, which was the source of the rattling.
No visible damage to the PCB or components themselves — the issue was purely a seating and connection problem caused by movement during shipping.
Repair Process
- Fully powered down and disconnected the system, then removed the graphics card entirely to inspect for physical damage.
- Located and removed the sheared screw fragment from inside the case.
- Reseated the GPU firmly into the PCIe slot, confirming an audible and tactile click.
- Reconnected the power cables to the card, double-checking each connection.
- Reinforced the card's mounting bracket with a replacement screw and confirmed the card was fully secured against future movement.
- Powered the system on and confirmed stable video output.
- Ran an extended stress test (2+ hours) to confirm stability under load, monitoring temperatures and checking for any artifacts or crashes.
Final Outcome
The system passed all stress testing with stable temperatures and no display issues. The client was walked through how to check GPU seating themselves in the future, and given packing recommendations for any future shipping needs.
Turnaround time: Same day.
Have a system that arrived damaged? Home Net Computers inspects and repairs shipping-related damage for clients throughout the Greater Seattle Area. Call 206-478-5001 or reach out through our contact form.
Case Study: Laptop Recovery After Liquid Spill
The Problem
A client spilled a glass of water directly onto their laptop keyboard while it was powered on. The laptop shut off immediately, and several keys stopped responding entirely when the client attempted to power it back on the next day.
Diagnosis
Because the client made the mistake of trying to power the laptop back on before it had fully dried, further investigation was needed to assess the extent of the damage. Disassembly revealed:
- Corrosion beginning to form on portions of the keyboard's ribbon connector.
- Minor liquid residue near the edge of the motherboard, close to the keyboard connector header.
- The battery, storage drive, and RAM appeared undamaged and outside the direct path of the spill.
The good news: because the spill was water (not a sugary or conductive liquid) and the affected area was contained mostly to the keyboard assembly, the core motherboard components were largely spared.
Repair Process
- Fully disassembled the laptop to separate all components from the affected area.
- Cleaned corrosion from the keyboard ribbon connector and surrounding contacts using isopropyl alcohol and specialized cleaning tools.
- Inspected the motherboard closely under magnification for any further corrosion or damage near connector pins.
- Allowed all components to fully dry before any reassembly or power testing.
- Tested the motherboard independently (without the keyboard) to confirm it powered on and ran normally.
- Replaced the keyboard assembly, since the ribbon cable and several keys had sustained damage beyond reliable repair.
- Reassembled the system and ran extended testing to confirm full functionality, including all ports, the trackpad, and speakers.
Final Outcome
The laptop was fully restored with a new keyboard assembly, and all data on the drive was confirmed intact and accessible — no data recovery was needed since the storage drive itself was undamaged. The client was advised on immediate steps to take if a spill happens again (power off immediately, do not attempt to power back on, bring in as soon as possible).
Turnaround time: 3 business days (pending keyboard assembly part arrival).
Spilled something on your laptop? Time matters — power it off immediately and don't try turning it back on. Home Net Computers handles liquid damage assessment and repair for clients throughout the Greater Seattle Area. Call 206-478-5001 or reach out through our contact form right away.
Case Study: Repairing a Bent CPU Socket Pin
The Problem
A client attempting a DIY CPU upgrade contacted us after their system failed to boot post-installation — no display output, and the motherboard's diagnostic LED indicated a CPU-related error. The client mentioned the processor "didn't seat as smoothly as expected" during installation.
Diagnosis
Visual inspection of the motherboard's CPU socket under magnification revealed several bent pins near one corner of the socket — a common result of a CPU being seated at a slight angle or with uneven pressure during installation. Modern CPU sockets have extremely fine, closely spaced pins, making this one of the more delicate repairs in PC hardware.
Further testing confirmed:
- Approximately six pins were visibly bent, ranging from minor to moderate deflection.
- No pins appeared to be broken off entirely, which meant repair was possible rather than requiring a full motherboard replacement.
- The CPU itself tested as undamaged once installed in a different, known-good motherboard.
Repair Process
- Carefully examined the socket under high magnification to map out exactly which pins were bent and in what direction.
- Using fine precision tools designed for this exact purpose, gently and gradually realigned each bent pin back to its original position — working slowly to avoid snapping any pins, which would have made the motherboard unrecoverable.
- Re-inspected the socket under magnification after each adjustment to confirm proper alignment before moving to the next pin.
- Once all pins were realigned, carefully reseated the CPU, confirming smooth, even contact with no resistance.
- Powered on the system and confirmed successful POST (power-on self-test) and display output.
- Ran extended stress testing to confirm stable performance under load with no errors related to CPU communication.
Final Outcome
The motherboard was fully restored without needing replacement, saving the client a significant cost compared to buying a new board. The system has run reliably since the repair. We also walked the client through proper CPU seating technique for any future upgrades.
Turnaround time: 2 business days.
Bent a pin during a CPU installation? Don't try to force it — bent socket pins require careful, precise correction. Home Net Computers repairs bent CPU sockets for clients throughout the Greater Seattle Area. Call 206-478-5001 or reach out through our contact form.
Case Study: Diagnosing and Resolving a Failed Motherboard
The Problem
A client's desktop, used primarily for video editing work, began experiencing random shutdowns that progressively worsened over about two weeks, eventually reaching a point where the system wouldn't power on at all — no lights, no fans, no response.
Diagnosis
Because total power loss can indicate either a power supply or motherboard issue, testing started with process of elimination:
- A known-good power supply was swapped in — the system still showed no signs of life, ruling out the PSU.
- Visual inspection of the motherboard revealed several bulging capacitors near the CPU power delivery area, a clear sign of component failure.
- The motherboard was several years old and had been running demanding workloads (video rendering) regularly, which places sustained stress on power delivery components over time.
This confirmed the motherboard itself had failed, likely due to worn power delivery components reaching end of life under sustained heavy use.
Repair Process
- Because the failure involved core power delivery components rather than a simple connector or software issue, a direct repair wasn't a practical or cost-effective option compared to replacement. The repair process focused on a clean transition to new hardware:
- Confirmed with the client that replacement was the more sensible path forward compared to attempting board-level component repair, given the age of the board and cost considerations.
- Recommended a replacement motherboard compatible with the client's existing CPU and RAM to minimize additional cost.
- Carefully removed the old motherboard, and salvaged the CPU, RAM, storage drive, and cooler for reuse.
- Installed and configured the new motherboard, including BIOS setup and driver installation.
- Reinstalled the operating system fresh, since a motherboard swap typically requires this for full stability.
- Restored the client's files from their existing storage drive, which had not been affected by the motherboard failure.
- Ran extended stress testing to confirm stable operation under the demanding video editing workloads the client regularly uses.
Final Outcome
The system was back up and running with a new, more capable motherboard, reusing the client's existing CPU, RAM, and storage to keep costs down. The client's files were fully preserved throughout the process. The system has run without incident since.
Turnaround time: 3 business days.
Suspect a failed motherboard? Home Net Computers diagnoses power and motherboard issues honestly — recommending repair when it makes sense, and replacement when it doesn't — for clients throughout the Greater Seattle Area. Call 206-478-5001 or reach out through our contact form.
Case Study: Diagnosing a Failed Graphics Card
The Problem
A client's gaming PC began displaying visual artifacts — colored specks, distorted textures, and occasional flickering — during gameplay. Over the following days, the issue progressed to the system crashing entirely during any graphically demanding application, sometimes accompanied by driver crash notifications.
Diagnosis
The symptoms suggested several possibilities: driver issues, overheating, or a genuinely failing card. Diagnosis followed a structured process:
- A clean driver reinstall was performed first, ruling out software-level driver corruption as the sole cause — artifacts persisted.
- Temperatures were monitored under load and found to be within normal range, ruling out simple overheating.
- The card was tested in a second, known-good system, where the same artifacts appeared — confirming the issue was with the card itself, not the client's system.
- Visual inspection under magnification revealed slight discoloration on a section of the PCB near the memory modules, consistent with heat-related degradation over time.
This pointed to failing VRAM (video memory) modules on the card — a hardware-level failure rather than a software or system issue.
Repair Process
- Confirmed the diagnosis by testing the card in isolation across multiple systems to rule out any external cause.
- Discussed repair options with the client — board-level VRAM repair versus replacement — weighing the age and value of the card against repair cost.
- Given the card's age and the extent of the affected memory modules, replacement was determined to be the more practical and cost-effective path.
- Assisted the client in selecting a replacement card appropriate for their system's power supply, case size, and performance needs.
- Installed the new card, including a clean driver installation to avoid any conflicts with remnants of the old card's drivers.
- Ran extended stress testing across multiple demanding titles to confirm stable performance with no artifacts or crashes.
Final Outcome
The client's system was restored to full graphical performance with a new card suited to their needs and budget. The old card was returned to the client, who was informed it could still be evaluated for warranty coverage if within the manufacturer's warranty period.
Turnaround time: 2 business days (including client decision time on replacement options).
Seeing artifacts or crashes during gaming? Home Net Computers tests graphics cards thoroughly before recommending repair or replacement for clients throughout the Greater Seattle Area. Call 206-478-5001 or reach out through our contact form.
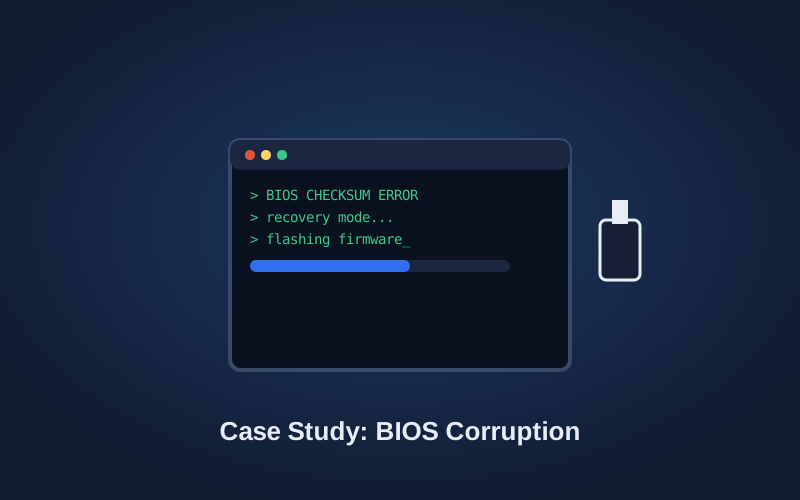
Case Study: Recovering a System From BIOS Corruption
The Problem
A client's desktop lost power unexpectedly during what turned out to be a BIOS update — a rare but serious risk of the update process. After the power interruption, the system wouldn't boot at all: no display output, no beep codes, and no response from any input.
Diagnosis
An interrupted BIOS update is one of the more serious failure scenarios in PC repair, since the BIOS is the low-level firmware that allows the system to start up in the first place. Without it functioning correctly, the motherboard can't complete even the most basic startup sequence.
Testing confirmed:
- The motherboard showed some signs of power (fans spinning, lights on) but never progressed to POST (power-on self-test).
- No beep codes were audible, which on this particular motherboard model, is consistent with corrupted BIOS firmware rather than a component failure.
- The motherboard's specific model included a secondary BIOS recovery feature, which meant a full board replacement likely wasn't necessary.
Repair Process
- Confirmed the motherboard model and researched its specific BIOS recovery procedure, since these vary significantly between manufacturers and models.
- Downloaded the correct, verified BIOS firmware file directly from the manufacturer's official source, confirming it matched the exact board revision.
- Prepared a USB drive formatted and named according to the manufacturer's specific recovery requirements.
- Used the motherboard's built-in BIOS recovery/flashback feature to reflash the firmware without needing a functioning CPU or display output — a recovery method built into many modern boards specifically for this scenario.
- Monitored the recovery process closely, since interrupting it a second time could cause permanent damage to the board.
- Once recovery completed, powered on the system and confirmed successful POST and BIOS access.
- Verified BIOS settings were restored to sensible defaults and confirmed compatibility with the client's installed components before returning the system to normal operation.
Final Outcome
The system was fully recovered without requiring a motherboard replacement, saving the client significant cost. The client's operating system and files, stored on a separate drive, were unaffected throughout the process. We also advised the client on best practices for future BIOS updates — including using a UPS (battery backup) during any firmware update to prevent a repeat incident.
Turnaround time: 1 business day.
BIOS update gone wrong, or system won't POST? Home Net Computers has experience recovering systems from BIOS corruption for clients throughout the Greater Seattle Area. Call 206-478-5001 or reach out through our contact form before attempting further updates yourself.
Case Study: Diagnosing and Resolving a Failed Motherboard
Diagnosing and Resolving a Failed Motherboard
Motherboard failure can look very similar to a failed power supply, defective memory, bad processor, or graphics-card problem. A computer may be completely unresponsive, power up without displaying anything, or turn on but fail to complete POST.
I diagnose these systems regularly. The important part is testing each component individually instead of assuming the motherboard is defective and replacing an expensive part unnecessarily.
The Problem
The computer either would not power on properly or would receive power but fail to initialize and complete POST. Because several different components can produce these symptoms, the motherboard could not be diagnosed based on the computer’s behavior alone.
Testing the Power Supply First
I begin by testing the power supply to confirm that it is operating correctly and delivering the proper output.
This is the first step because a failed or unstable power supply can make a functional motherboard appear dead. A failing power supply can also damage the motherboard and, in some cases, other components. Confirming correct power delivery prevents an incorrect diagnosis and helps determine whether more than one part has failed.
Testing the Memory and Processor
After confirming the power supply is functioning correctly, I remove the customer’s memory and processor and test them in a known-good system.
This establishes whether the customer’s components are working independently of the original motherboard. If the memory and processor operate correctly in the test system, they can be eliminated as the cause of the failure.
I then install a tested, functioning processor and memory in the customer’s motherboard. If the board still fails to initialize, will not power up correctly, or cannot complete POST with known-good components installed, the evidence points to a failed motherboard.
Confirming There Is Only One Failure
The diagnosis does not stop when the motherboard failure is identified. I finish testing the computer’s other major components to confirm that the motherboard is the only problem.
This is especially important when a power-delivery problem may have damaged more than one component. The customer needs to know the complete condition of the computer before deciding whether a repair is worthwhile.
Reviewing Replacement Options
Once testing is complete, I call the customer and explain what failed, what tested correctly, and which parts can be reused. I then review compatible motherboard options and the cost of completing the repair.
The customer approves the parts and repair before anything is ordered or replaced.
Installing and Configuring the New Motherboard
After approval, I remove the failed motherboard and install the replacement. The existing processor, memory, storage, graphics card, cooling system, and other components are reused when they have tested correctly and remain compatible.
I then update and configure the BIOS, install the necessary motherboard and device drivers, and verify that all components are recognized and operating correctly. Windows is reinstalled when necessary to ensure stability with the replacement hardware.
Final Testing
Before returning the computer, I test the completed system under load. This includes checking the processor, memory, graphics card, storage, temperatures, power delivery, and overall system stability.
The repair is complete only after the computer consistently starts, completes POST, loads Windows correctly, and passes extended testing without errors.
Diagnosis by Elimination, Not Guesswork
A failed motherboard should be confirmed through component testing. Replacing the board based only on a black screen or failure to power up can waste the customer’s money and leave the original problem unresolved.
Home Net Computers has diagnosed motherboard, power-supply, processor, memory, and startup failures throughout the Greater Seattle area since 2003. Richard personally tests each system, explains the results, and reviews the available repair options before parts are replaced.
Call 206-478-5001 or use our contact form if your computer will not power on, display an image, or complete POST.
Written by Richard Mallory, Home Net Computers. Professional IT experience since 1993.
Case Study: Diagnosing a Failed Graphics Card
The Problem
A client's gaming PC began displaying visual artifacts — colored specks, distorted textures, and occasional flickering — during gameplay. Over the following days, the issue progressed to the system crashing entirely during any graphically demanding application, sometimes accompanied by driver crash notifications.
Diagnosis
The symptoms suggested several possibilities: driver issues, overheating, or a genuinely failing card. Diagnosis followed a structured process:
- A clean driver reinstall was performed first, ruling out software-level driver corruption as the sole cause — artifacts persisted.
- Temperatures were monitored under load and found to be within normal range, ruling out simple overheating.
- The card was tested in a second, known-good system, where the same artifacts appeared — confirming the issue was with the card itself, not the client's system.
- Visual inspection under magnification revealed slight discoloration on a section of the PCB near the memory modules, consistent with heat-related degradation over time.
This pointed to failing VRAM (video memory) modules on the card — a hardware-level failure rather than a software or system issue.
Repair Process
- Confirmed the diagnosis by testing the card in isolation across multiple systems to rule out any external cause.
- Discussed repair options with the client — board-level VRAM repair versus replacement — weighing the age and value of the card against repair cost.
- Given the card's age and the extent of the affected memory modules, replacement was determined to be the more practical and cost-effective path.
- Assisted the client in selecting a replacement card appropriate for their system's power supply, case size, and performance needs.
- Installed the new card, including a clean driver installation to avoid any conflicts with remnants of the old card's drivers.
- Ran extended stress testing across multiple demanding titles to confirm stable performance with no artifacts or crashes.
Final Outcome
The client's system was restored to full graphical performance with a new card suited to their needs and budget. The old card was returned to the client, who was informed it could still be evaluated for warranty coverage if within the manufacturer's warranty period.
Turnaround time: 2 business days (including client decision time on replacement options).
Seeing artifacts or crashes during gaming? Home Net Computers tests graphics cards thoroughly before recommending repair or replacement for clients throughout the Greater Seattle Area. Call 206-478-5001 or reach out through our contact form.
Case Study: Recovering a System From BIOS Corruption
The Problem
A client's desktop lost power unexpectedly during what turned out to be a BIOS update — a rare but serious risk of the update process. After the power interruption, the system wouldn't boot at all: no display output, no beep codes, and no response from any input.
Diagnosis
An interrupted BIOS update is one of the more serious failure scenarios in PC repair, since the BIOS is the low-level firmware that allows the system to start up in the first place. Without it functioning correctly, the motherboard can't complete even the most basic startup sequence.
Testing confirmed:
- The motherboard showed some signs of power (fans spinning, lights on) but never progressed to POST (power-on self-test).
- No beep codes were audible, which on this particular motherboard model, is consistent with corrupted BIOS firmware rather than a component failure.
- The motherboard's specific model included a secondary BIOS recovery feature, which meant a full board replacement likely wasn't necessary.
Repair Process
- Confirmed the motherboard model and researched its specific BIOS recovery procedure, since these vary significantly between manufacturers and models.
- Downloaded the correct, verified BIOS firmware file directly from the manufacturer's official source, confirming it matched the exact board revision.
- Prepared a USB drive formatted and named according to the manufacturer's specific recovery requirements.
- Used the motherboard's built-in BIOS recovery/flashback feature to reflash the firmware without needing a functioning CPU or display output — a recovery method built into many modern boards specifically for this scenario.
- Monitored the recovery process closely, since interrupting it a second time could cause permanent damage to the board.
- Once recovery completed, powered on the system and confirmed successful POST and BIOS access.
- Verified BIOS settings were restored to sensible defaults and confirmed compatibility with the client's installed components before returning the system to normal operation.
Final Outcome
The system was fully recovered without requiring a motherboard replacement, saving the client significant cost. The client's operating system and files, stored on a separate drive, were unaffected throughout the process. We also advised the client on best practices for future BIOS updates — including using a UPS (battery backup) during any firmware update to prevent a repeat incident.
Turnaround time: 1 business day.
BIOS update gone wrong, or system won't POST? Home Net Computers has experience recovering systems from BIOS corruption for clients throughout the Greater Seattle Area. Call 206-478-5001 or reach out through our contact form before attempting further updates yourself.
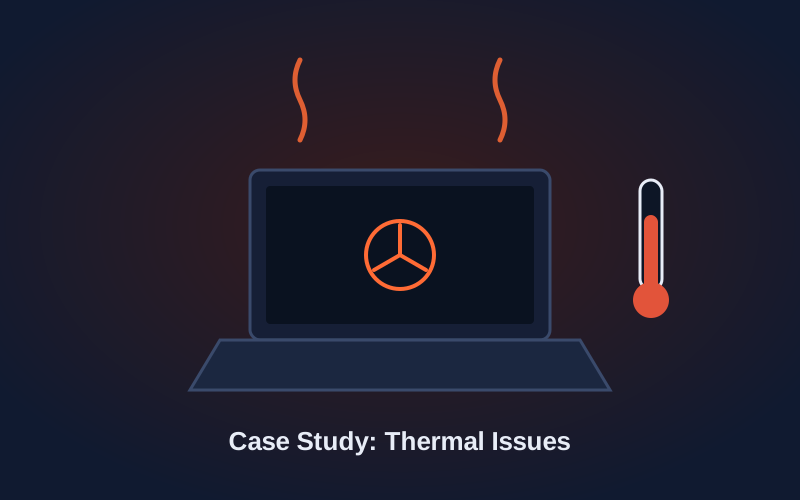
Case Study: Resolving Chronic Thermal Throttling on a Gaming Laptop
The Problem
A client's gaming laptop, roughly three years old, had progressively lost performance over several months — frame rates in games had dropped noticeably, fans ran loudly and constantly even during light tasks, and the laptop had started shutting down unexpectedly during longer gaming sessions.
Diagnosis
Temperature monitoring under load revealed the CPU and GPU were both reaching thermal limits far faster than they should for a laptop of this specification, triggering aggressive thermal throttling (the system deliberately slowing itself down to prevent damage) and, in more extreme cases, emergency shutdowns.
Disassembly revealed the underlying causes:
- Significant dust buildup packed into both the CPU and GPU heat sinks, substantially restricting airflow.
- The original thermal paste had dried out and cracked — a normal occurrence after a few years, but one that severely reduces heat transfer efficiency.
- One of the two cooling fans was spinning at a noticeably reduced speed, likely due to a combination of dust and aging bearings.
Repair Process
- Fully disassembled the laptop to access the internal cooling system, following the specific service procedure for this model.
- Removed the CPU and GPU heat sinks and thoroughly cleaned years of accumulated dust from the fans, heat sink fins, and internal vents.
- Carefully cleaned off the old, degraded thermal paste from both the CPU and GPU dies as well as their respective heat sink contact points.
- Applied fresh, high-performance thermal paste to both components.
- Inspected the underperforming fan and cleaned its bearing assembly, restoring normal spin speed.
- Reassembled the laptop and ran extended stress testing across both CPU and GPU simultaneously to simulate real gaming conditions.
- Recorded before-and-after temperature comparisons to confirm the improvement.
Final Outcome
Temperatures under sustained load dropped significantly compared to pre-repair readings, and thermal throttling no longer occurred during normal gaming sessions. Fan noise returned to a normal, expected level, and the client reported no further unexpected shutdowns in the weeks following the repair. The client was advised to schedule a similar cleaning roughly every 12–18 months to prevent the issue from recurring.
Turnaround time: 1 business day.
Laptop running hot, loud, or throttling under load? Home Net Computers provides thorough cleaning and thermal repair for laptops and desktops throughout the Greater Seattle Area. Call 206-478-5001 or reach out through our contact form.
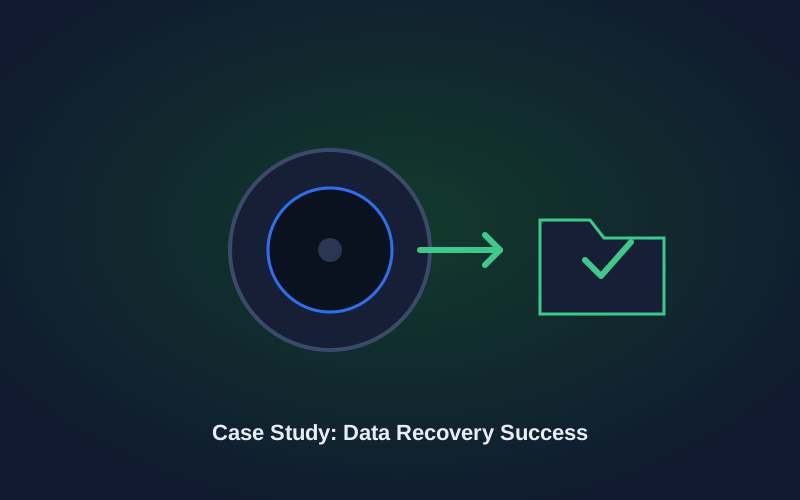
Case Study: Recovering Years of Family Photos From a Failed Drive
The Problem
A client's external hard drive, containing several years of family photos and videos with no backup elsewhere, stopped being recognized by their computer. The drive made a faint clicking sound when connected, and the client had already attempted to plug it into multiple computers in an effort to get it working — inadvertently increasing the risk to the data in the process.
Diagnosis
The clicking sound was an immediate red flag for a mechanical hard drive failure — commonly caused by the drive's read/write head failing to operate correctly, sometimes due to physical damage or component wear. Continued attempts to power on and access a clicking drive can worsen the damage and reduce recovery odds, so the drive was immediately set aside from further use once it arrived.
Initial assessment confirmed:
- The drive was not being detected by standard operating system tools.
- The clicking pattern was consistent with a read/write head issue rather than a fully seized motor.
- No signs of external physical damage (drops, liquid exposure) were present, suggesting the failure was due to internal component wear rather than an external event.
Repair Process
- Immediately stopped any further power-on attempts to avoid compounding the mechanical damage.
- Assessed the drive's specific failure signature to determine the appropriate recovery approach for this type of mechanical issue.
- Worked in a controlled environment to minimize any further risk to the drive during the recovery attempt.
- Used specialized data recovery tools designed to work around failing read/write components, prioritizing a careful, low-risk approach over speed.
- Successfully established limited, stable access to the drive long enough to begin imaging its contents to a separate, healthy drive.
- Once a full image was captured, all further recovery and file extraction work was performed on the copied image — not the original failing drive — to eliminate any further risk to the source data.
- Verified recovered files for integrity, checking a sample of photos and videos to confirm they opened correctly and were not corrupted.
- Transferred all recovered files to a new external drive for the client, along with a discussion about backup practices going forward.
Final Outcome
The vast majority of the client's photos and videos were successfully recovered — years of family memories the client had believed might be permanently lost. The client was set up with a straightforward backup routine (a second drive plus cloud backup) to protect against this happening again in the future.
Turnaround time: 5 business days.
Dealing with a clicking, unrecognized, or failed drive? Stop using it immediately and reach out — every additional attempt to access a failing drive can reduce recovery odds. Home Net Computers has helped clients throughout the Greater Seattle Area recover critical files from failed drives. Call 206-478-5001 or reach out through our contact form as soon as possible.
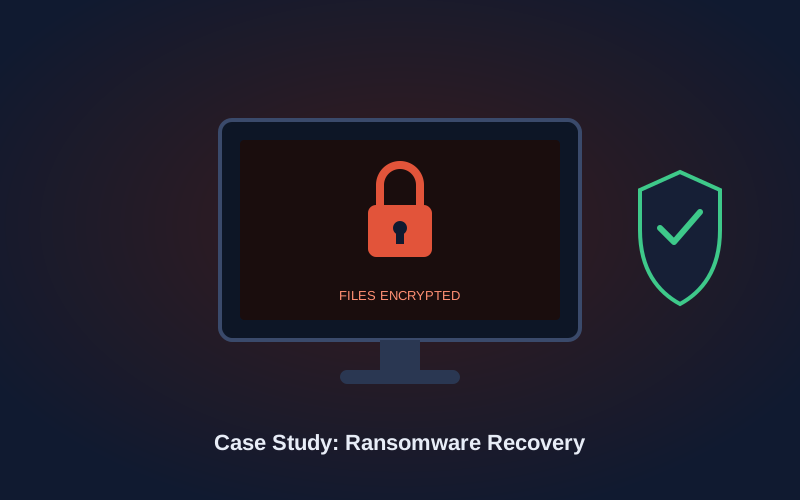
Case Study: Recovering a Small Business PC From Ransomware
The Problem
A small business owner arrived with a desktop that had suddenly become unusable — files across the system had been renamed with an unfamiliar file extension, and a ransom note demanding payment in cryptocurrency appeared on the desktop, threatening permanent data loss if payment wasn't made within a set time. The client had not paid and immediately disconnected the machine from the network, unsure what to do next.
Diagnosis
Disconnecting the machine from the network immediately was the right first move — it prevented the ransomware from potentially spreading to other devices or shared drives on the same network. Initial assessment focused on scope and containment:
- Confirmed the ransomware had encrypted local documents, spreadsheets, and a folder of client invoices — the business's most critical files.
- Checked whether the encryption had reached any connected external or network drives; fortunately, it had not spread beyond the local machine.
- Identified the likely entry point as a malicious email attachment opened a few days prior, based on the client's account of recent activity.
- Confirmed the client had no recent backup of the affected files — a common and costly gap for small businesses.
Repair Process
- Kept the machine fully isolated from the network throughout the entire process to prevent any further spread.
- Did not recommend paying the ransom — payment doesn't guarantee file recovery and directly funds further criminal activity.
- Ran a full malware scan and removal using reputable, up-to-date security tools to fully remove the ransomware and any associated malicious files from the system.
- Attempted file recovery through available means, including checking for Windows shadow copies and any recoverable file remnants that predated the encryption.
- Successfully recovered a portion of the affected files through shadow copy restoration; the remainder were unfortunately not recoverable, which was communicated clearly and honestly to the client.
- Fully reinstalled the operating system to guarantee no remnants of the malware remained, rather than relying solely on removal tools.
- Reinstalled and updated all necessary business software, and configured Windows security settings and update policies to reduce future risk.
- Set the client up with a proper backup solution (local plus cloud) so future incidents — ransomware or otherwise — wouldn't put critical business files at risk again.
Final Outcome
A meaningful portion of the client's files were recovered through shadow copy restoration, and the system was returned fully clean and secured. While not every file could be recovered, the client left with a functioning, malware-free system and — for the first time — an actual backup strategy in place. We also walked the client through basic email security practices to help prevent a repeat incident.
Turnaround time: 3 business days.
Dealing with ransomware or a suspected malware infection? Disconnect the device from your network immediately and don't pay the ransom. Home Net Computers provides malware removal and recovery for individuals and small businesses throughout the Greater Seattle Area. Call 206-478-5001 or reach out through our contact form right away.
Case Study: Resolving Chronic Thermal Throttling on a Gaming Laptop
The Problem
A client's gaming laptop, roughly three years old, had progressively lost performance over several months — frame rates in games had dropped noticeably, fans ran loudly and constantly even during light tasks, and the laptop had started shutting down unexpectedly during longer gaming sessions.
Diagnosis
Temperature monitoring under load revealed the CPU and GPU were both reaching thermal limits far faster than they should for a laptop of this specification, triggering aggressive thermal throttling (the system deliberately slowing itself down to prevent damage) and, in more extreme cases, emergency shutdowns.
Disassembly revealed the underlying causes:
- Significant dust buildup packed into both the CPU and GPU heat sinks, substantially restricting airflow.
- The original thermal paste had dried out and cracked — a normal occurrence after a few years, but one that severely reduces heat transfer efficiency.
- One of the two cooling fans was spinning at a noticeably reduced speed, likely due to a combination of dust and aging bearings.
Repair Process
- Fully disassembled the laptop to access the internal cooling system, following the specific service procedure for this model.
- Removed the CPU and GPU heat sinks and thoroughly cleaned years of accumulated dust from the fans, heat sink fins, and internal vents.
- Carefully cleaned off the old, degraded thermal paste from both the CPU and GPU dies as well as their respective heat sink contact points.
- Applied fresh, high-performance thermal paste to both components.
- Inspected the underperforming fan and cleaned its bearing assembly, restoring normal spin speed.
- Reassembled the laptop and ran extended stress testing across both CPU and GPU simultaneously to simulate real gaming conditions.
- Recorded before-and-after temperature comparisons to confirm the improvement.
Final Outcome
Temperatures under sustained load dropped significantly compared to pre-repair readings, and thermal throttling no longer occurred during normal gaming sessions. Fan noise returned to a normal, expected level, and the client reported no further unexpected shutdowns in the weeks following the repair. The client was advised to schedule a similar cleaning roughly every 12–18 months to prevent the issue from recurring.
Turnaround time: 1 business day.
Laptop running hot, loud, or throttling under load? Home Net Computers provides thorough cleaning and thermal repair for laptops and desktops throughout the Greater Seattle Area. Call 206-478-5001 or reach out through our contact form.
Case Study: Recovering Years of Family Photos From a Failed Drive
The Problem
A client's external hard drive, containing several years of family photos and videos with no backup elsewhere, stopped being recognized by their computer. The drive made a faint clicking sound when connected, and the client had already attempted to plug it into multiple computers in an effort to get it working — inadvertently increasing the risk to the data in the process.
Diagnosis
The clicking sound was an immediate red flag for a mechanical hard drive failure — commonly caused by the drive's read/write head failing to operate correctly, sometimes due to physical damage or component wear. Continued attempts to power on and access a clicking drive can worsen the damage and reduce recovery odds, so the drive was immediately set aside from further use once it arrived.
Initial assessment confirmed:
- The drive was not being detected by standard operating system tools.
- The clicking pattern was consistent with a read/write head issue rather than a fully seized motor.
- No signs of external physical damage (drops, liquid exposure) were present, suggesting the failure was due to internal component wear rather than an external event.
Repair Process
- Immediately stopped any further power-on attempts to avoid compounding the mechanical damage.
- Assessed the drive's specific failure signature to determine the appropriate recovery approach for this type of mechanical issue.
- Worked in a controlled environment to minimize any further risk to the drive during the recovery attempt.
- Used specialized data recovery tools designed to work around failing read/write components, prioritizing a careful, low-risk approach over speed.
- Successfully established limited, stable access to the drive long enough to begin imaging its contents to a separate, healthy drive.
- Once a full image was captured, all further recovery and file extraction work was performed on the copied image — not the original failing drive — to eliminate any further risk to the source data.
- Verified recovered files for integrity, checking a sample of photos and videos to confirm they opened correctly and were not corrupted.
- Transferred all recovered files to a new external drive for the client, along with a discussion about backup practices going forward.
Final Outcome
The vast majority of the client's photos and videos were successfully recovered — years of family memories the client had believed might be permanently lost. The client was set up with a straightforward backup routine (a second drive plus cloud backup) to protect against this happening again in the future.
Turnaround time: 5 business days.
Dealing with a clicking, unrecognized, or failed drive? Stop using it immediately and reach out — every additional attempt to access a failing drive can reduce recovery odds. Home Net Computers has helped clients throughout the Greater Seattle Area recover critical files from failed drives. Call 206-478-5001 or reach out through our contact form as soon as possible.
Case Study: Recovering a Small Business PC From Ransomware
The Problem
A small business owner arrived with a desktop that had suddenly become unusable — files across the system had been renamed with an unfamiliar file extension, and a ransom note demanding payment in cryptocurrency appeared on the desktop, threatening permanent data loss if payment wasn't made within a set time. The client had not paid and immediately disconnected the machine from the network, unsure what to do next.
Diagnosis
Disconnecting the machine from the network immediately was the right first move — it prevented the ransomware from potentially spreading to other devices or shared drives on the same network. Initial assessment focused on scope and containment:
- Confirmed the ransomware had encrypted local documents, spreadsheets, and a folder of client invoices — the business's most critical files.
- Checked whether the encryption had reached any connected external or network drives; fortunately, it had not spread beyond the local machine.
- Identified the likely entry point as a malicious email attachment opened a few days prior, based on the client's account of recent activity.
- Confirmed the client had no recent backup of the affected files — a common and costly gap for small businesses.
Repair Process
- Kept the machine fully isolated from the network throughout the entire process to prevent any further spread.
- Did not recommend paying the ransom — payment doesn't guarantee file recovery and directly funds further criminal activity.
- Ran a full malware scan and removal using reputable, up-to-date security tools to fully remove the ransomware and any associated malicious files from the system.
- Attempted file recovery through available means, including checking for Windows shadow copies and any recoverable file remnants that predated the encryption.
- Successfully recovered a portion of the affected files through shadow copy restoration; the remainder were unfortunately not recoverable, which was communicated clearly and honestly to the client.
- Fully reinstalled the operating system to guarantee no remnants of the malware remained, rather than relying solely on removal tools.
- Reinstalled and updated all necessary business software, and configured Windows security settings and update policies to reduce future risk.
- Set the client up with a proper backup solution (local plus cloud) so future incidents — ransomware or otherwise — wouldn't put critical business files at risk again.
Final Outcome
A meaningful portion of the client's files were recovered through shadow copy restoration, and the system was returned fully clean and secured. While not every file could be recovered, the client left with a functioning, malware-free system and — for the first time — an actual backup strategy in place. We also walked the client through basic email security practices to help prevent a repeat incident.
Turnaround time: 3 business days.
Dealing with ransomware or a suspected malware infection? Disconnect the device from your network immediately and don't pay the ransom. Home Net Computers provides malware removal and recovery for individuals and small businesses throughout the Greater Seattle Area. Call 206-478-5001 or reach out through our contact form right away.
CONTACT OUR TEAM TODAY
Fill out the form below to contact Home Net Computers. We look forward to speaking with you.
Sign up to our newsletter
Thank you for contacting us.
We will get back to you as soon as possible.
Oops, there was an error in sending your message.
Please try again later.