
Knowledge Center
Why Won't My Computer Boot? Common Causes and Fixes
Few things are more frustrating than pressing the power button and getting nothing — or a machine that starts up but never makes it to your desktop. T
he good news: most boot failures trace back to a handful of common culprits, and many can be diagnosed without opening your wallet.
1. No Power at All
If your computer won't even turn on — no lights, no fans, no sound — start with the basics:
- Check that the power cable is firmly seated at both ends.
- Try a different outlet or power strip to rule out a dead circuit.
- On desktops, confirm the power supply switch (on the back of the case) is set to "on."
- On laptops, remove the battery (if removable) and try running on AC power alone.
If none of that works, the power supply unit (PSU) itself is a common failure point — see our guide on [motherboard vs. power supply failure](02-motherboard-vs-power-supply-failure.md) for how to tell the difference.
2. Power Turns On, But Nothing Displays
Fans spin, lights come on, but the screen stays black. This usually points to one of a few areas:
- Loose or failing RAM — reseat your memory sticks, or try booting with just one stick installed.
- Display connection issues — try a different monitor or cable, and if you have a dedicated graphics card, confirm the monitor is plugged into it (not the motherboard's video port).
- Failed GPU — if you have onboard graphics, try connecting directly to the motherboard's display output to isolate the problem.
3. Computer Starts, Then Shuts Off or Restarts
This pattern often points to overheating, power delivery issues, or a failing component under load. Dust buildup, a dying PSU, or a motherboard nearing failure are common causes. If your machine only crashes during demanding tasks (gaming, video editing), overheating is worth ruling out first — check our [laptop overheating guide](08-laptop-overheating.md) for diagnostic tips that also apply to desktops.
4. Boot Loop or Stuck on Manufacturer Logo
If your PC gets to the logo screen but won't proceed to Windows:
- A corrupted boot drive or failing storage device is the most common cause.
- Recently installed updates or drivers can also cause this — booting into Safe Mode (where possible) can help you undo recent changes.
- Unplugging any non-essential USB devices can rule out a peripheral conflict.
5. "Operating System Not Found" or Similar Errors
This typically means the computer can't locate a valid boot drive. It can result from a disconnected drive cable, a drive that has failed entirely, or corrupted boot files. If you suspect the drive itself has failed, don't keep restarting the machine — repeated boot attempts can make data recovery harder. See our guide on [data recovery after drive failure](09-data-recovery-after-drive-failure.md).
When to Call a Professional
- Boot problems sit at the intersection of hardware and software, which makes them tricky to diagnose with confidence from home. If you've tried the basics above and you're still stuck — or if you're not comfortable opening your case — it's a good time to bring it in.
**Home Net Computers** has been diagnosing boot issues across the Greater Seattle Area since 2003. Richard personally handles every system, so you get a real diagnosis instead of a guess. Give us a call at **206-478-5001** or reach out through our contact form to get your system back up and running.
- Check that the power cable is firmly seated at both ends.
Motherboard vs. Power Supply Failure: How to Tell the Difference
When a computer refuses to start, two of the most common — and most often confused — culprits are the motherboard and the power supply unit (PSU). Both can produce eerily similar symptoms: no power, no display, or random shutdowns. But the diagnosis (and the fix) is very different depending on which one is actually at fault.
Why These Two Get Confused
- The PSU delivers power to every component in your system, including the motherboard. When the PSU fails, the entire system looks "dead" — which can easily be mistaken for a dead motherboard. Meanwhile, a failing motherboard can also cause total power loss if the fault lies in its power delivery circuitry. Without testing, it's genuinely hard to tell them apart by symptoms alone.
Signs That Point to a Power Supply Problem
- The system shows absolutely no signs of life — no fans, no lights, no beeps.
- You hear a faint clicking or buzzing sound from the PSU when you try to power on.
- The system randomly shuts down under load (gaming, rendering, heavy multitasking) but runs fine for light tasks.
- A burning smell or visible damage (bulging capacitors, scorch marks) near the PSU.
- The system worked fine, then stopped after a power surge or outage.
Signs That Point to a Motherboard Problem
- The PSU fan spins and case lights turn on, but nothing else happens — no beeps, no display, no drive activity.
- Intermittent boot issues that seem to have no consistent trigger.
- USB ports, front-panel connections, or expansion slots stop working individually.
- Visible damage on the board itself — bulging or leaking capacitors, burn marks, or bent pins in the socket.
- The system was recently moved, upgraded, or exposed to static electricity before problems started.
A Simple Test: The PSU Swap
The most reliable way to isolate the problem without specialized tools is to test with a known-good power supply. If a replacement PSU brings the system back to life, the original PSU was the problem. If the system still won't respond, the issue likely lies with the motherboard (or another component entirely, like RAM or CPU).
Technicians often use a **PSU tester** or **multimeter** to check voltage output directly, which can confirm a failing power supply without needing a spare unit on hand.
Why Getting This Right Matters
- Replacing the wrong part wastes money and doesn't fix the actual problem. A new motherboard is a significantly bigger investment than a new PSU — and in many cases, a motherboard replacement means reinstalling your operating system and reconfiguring your entire setup. Getting an accurate diagnosis before buying parts can save you both time and money.
When to Call a Professional
- Because the symptoms overlap so much, a proper diagnosis really benefits from hands-on testing with the right equipment. Guessing and swapping parts can turn a simple fix into an expensive one.
**Home Net Computers** diagnoses power and motherboard issues for customers throughout the Greater Seattle Area — Bellevue, Redmond, Kirkland, Everett, and beyond. We'll test your system properly and tell you exactly what's wrong before any money is spent on parts. Call **206-478-5001** or reach out through our contact form to get a straight answer.
Signs Your SSD Is Failing (And What to Do About It)
Solid state drives (SSDs) are more reliable than traditional hard drives in many ways — no moving parts, faster speeds, better shock resistance — but they aren't immune to failure. And when an SSD does fail, it often happens with less warning than a mechanical drive. Knowing the early warning signs can be the difference between a smooth data backup and a scramble to recover lost files.
1. Files Won't Save, Open, or Copy Properly
If you're getting errors when trying to save documents, copy files, or open programs that used to work fine, your drive may be developing bad sectors — areas of the drive that can no longer reliably store data.
2. Frequent Freezing or Crashing
An SSD nearing failure can cause your entire system to freeze unexpectedly, especially during file-heavy tasks like installing updates, opening large programs, or transferring files. If this is happening more and more often, it's worth investigating.
3. Blue Screen Errors Related to Storage
Certain blue screen of death (BSOD) errors — particularly ones mentioning disk, storage, or file system errors — often trace back to a failing SSD. See our [blue screen troubleshooting guide](04-blue-screen-troubleshooting.md) for how to identify specific error codes.
4. Your Computer Boots Increasingly Slowly
A healthy SSD should get you to your desktop in seconds. If boot times have been creeping up week over week, especially paired with any of the other symptoms here, your drive may be struggling to read its own boot files.
5. Read-Only Mode or Missing Files
Some failing SSDs will suddenly switch to read-only mode as a self-protective measure, or files and folders you know you saved will simply disappear. This is one of the more urgent warning signs — it usually means the drive controller has detected serious errors.
6. SMART Warnings
Most drives run a background health-monitoring system called S.M.A.R.T. (Self-Monitoring, Analysis, and Reporting Technology). If your computer displays a SMART warning or error, take it seriously — it's the drive itself telling you something is wrong, often before symptoms become severe.
What to Do If You Suspect SSD Failure
1. Back up your data immediately. Don't wait to "see if it gets worse." Copy your important files to an external drive or cloud storage the moment you notice symptoms.
2. Avoid heavy use of the drive.Continuing to write large amounts of data to a failing SSD can accelerate failure and make recovery harder.
3. Don't attempt DIY recovery tools on a severely failing drive without understanding the risks — some recovery attempts can overwrite recoverable data.
4. Get a professional diagnosis f the drive contains anything you can't afford to lose.
If the drive has already failed and you're missing critical files, see our guide on [data recovery after drive failure](09-data-recovery-after-drive-failure.md).
When to Call a Professional
- SSD failure timelines can be unpredictable — some drives limp along for months, others fail within days of the first symptom. If you're seeing any combination of the signs above, it's better to act early.
**Home Net Computers** helps customers across Seattle, Bellevue, Tacoma, and the surrounding area diagnose failing drives and recover data before it's too late. Call **206-478-5001** or reach out through our contact form — the sooner we look at it, the better your odds of a full recovery.
Why Won't My Computer Boot? Common Causes and Fixes
Few things are more frustrating than pressing the power button and getting nothing — or a machine that starts up but never makes it to your desktop. T
he good news: most boot failures trace back to a handful of common culprits, and many can be diagnosed without opening your wallet.
1. No Power at All
If your computer won't even turn on — no lights, no fans, no sound — start with the basics:
- Check that the power cable is firmly seated at both ends.
- Try a different outlet or power strip to rule out a dead circuit.
- On desktops, confirm the power supply switch (on the back of the case) is set to "on."
- On laptops, remove the battery (if removable) and try running on AC power alone.
If none of that works, the power supply unit (PSU) itself is a common failure point — see our guide on [motherboard vs. power supply failure](02-motherboard-vs-power-supply-failure.md) for how to tell the difference.
2. Power Turns On, But Nothing Displays
Fans spin, lights come on, but the screen stays black. This usually points to one of a few areas:
- Loose or failing RAM — reseat your memory sticks, or try booting with just one stick installed.
- Display connection issues — try a different monitor or cable, and if you have a dedicated graphics card, confirm the monitor is plugged into it (not the motherboard's video port).
- Failed GPU — if you have onboard graphics, try connecting directly to the motherboard's display output to isolate the problem.
3. Computer Starts, Then Shuts Off or Restarts
This pattern often points to overheating, power delivery issues, or a failing component under load. Dust buildup, a dying PSU, or a motherboard nearing failure are common causes. If your machine only crashes during demanding tasks (gaming, video editing), overheating is worth ruling out first — check our [laptop overheating guide](08-laptop-overheating.md) for diagnostic tips that also apply to desktops.
4. Boot Loop or Stuck on Manufacturer Logo
If your PC gets to the logo screen but won't proceed to Windows:
- A corrupted boot drive or failing storage device is the most common cause.
- Recently installed updates or drivers can also cause this — booting into Safe Mode (where possible) can help you undo recent changes.
- Unplugging any non-essential USB devices can rule out a peripheral conflict.
5. "Operating System Not Found" or Similar Errors
This typically means the computer can't locate a valid boot drive. It can result from a disconnected drive cable, a drive that has failed entirely, or corrupted boot files. If you suspect the drive itself has failed, don't keep restarting the machine — repeated boot attempts can make data recovery harder. See our guide on [data recovery after drive failure](09-data-recovery-after-drive-failure.md).
When to Call a Professional
- Boot problems sit at the intersection of hardware and software, which makes them tricky to diagnose with confidence from home. If you've tried the basics above and you're still stuck — or if you're not comfortable opening your case — it's a good time to bring it in.
**Home Net Computers** has been diagnosing boot issues across the Greater Seattle Area since 2003. Richard personally handles every system, so you get a real diagnosis instead of a guess. Give us a call at **206-478-5001** or reach out through our contact form to get your system back up and running.
- Check that the power cable is firmly seated at both ends.
Motherboard vs. Power Supply Failure: How to Tell the Difference
When a computer refuses to start, two of the most common — and most often confused — culprits are the motherboard and the power supply unit (PSU). Both can produce eerily similar symptoms: no power, no display, or random shutdowns. But the diagnosis (and the fix) is very different depending on which one is actually at fault.
Why These Two Get Confused
- The PSU delivers power to every component in your system, including the motherboard. When the PSU fails, the entire system looks "dead" — which can easily be mistaken for a dead motherboard. Meanwhile, a failing motherboard can also cause total power loss if the fault lies in its power delivery circuitry. Without testing, it's genuinely hard to tell them apart by symptoms alone.
Signs That Point to a Power Supply Problem
- The system shows absolutely no signs of life — no fans, no lights, no beeps.
- You hear a faint clicking or buzzing sound from the PSU when you try to power on.
- The system randomly shuts down under load (gaming, rendering, heavy multitasking) but runs fine for light tasks.
- A burning smell or visible damage (bulging capacitors, scorch marks) near the PSU.
- The system worked fine, then stopped after a power surge or outage.
Signs That Point to a Motherboard Problem
- The PSU fan spins and case lights turn on, but nothing else happens — no beeps, no display, no drive activity.
- Intermittent boot issues that seem to have no consistent trigger.
- USB ports, front-panel connections, or expansion slots stop working individually.
- Visible damage on the board itself — bulging or leaking capacitors, burn marks, or bent pins in the socket.
- The system was recently moved, upgraded, or exposed to static electricity before problems started.
A Simple Test: The PSU Swap
The most reliable way to isolate the problem without specialized tools is to test with a known-good power supply. If a replacement PSU brings the system back to life, the original PSU was the problem. If the system still won't respond, the issue likely lies with the motherboard (or another component entirely, like RAM or CPU).
Technicians often use a **PSU tester** or **multimeter** to check voltage output directly, which can confirm a failing power supply without needing a spare unit on hand.
Why Getting This Right Matters
- Replacing the wrong part wastes money and doesn't fix the actual problem. A new motherboard is a significantly bigger investment than a new PSU — and in many cases, a motherboard replacement means reinstalling your operating system and reconfiguring your entire setup. Getting an accurate diagnosis before buying parts can save you both time and money.
When to Call a Professional
- Because the symptoms overlap so much, a proper diagnosis really benefits from hands-on testing with the right equipment. Guessing and swapping parts can turn a simple fix into an expensive one.
**Home Net Computers** diagnoses power and motherboard issues for customers throughout the Greater Seattle Area — Bellevue, Redmond, Kirkland, Everett, and beyond. We'll test your system properly and tell you exactly what's wrong before any money is spent on parts. Call **206-478-5001** or reach out through our contact form to get a straight answer.
Signs Your SSD Is Failing (And What to Do About It)
Solid state drives (SSDs) are more reliable than traditional hard drives in many ways — no moving parts, faster speeds, better shock resistance — but they aren't immune to failure. And when an SSD does fail, it often happens with less warning than a mechanical drive. Knowing the early warning signs can be the difference between a smooth data backup and a scramble to recover lost files.
1. Files Won't Save, Open, or Copy Properly
If you're getting errors when trying to save documents, copy files, or open programs that used to work fine, your drive may be developing bad sectors — areas of the drive that can no longer reliably store data.
2. Frequent Freezing or Crashing
An SSD nearing failure can cause your entire system to freeze unexpectedly, especially during file-heavy tasks like installing updates, opening large programs, or transferring files. If this is happening more and more often, it's worth investigating.
3. Blue Screen Errors Related to Storage
Certain blue screen of death (BSOD) errors — particularly ones mentioning disk, storage, or file system errors — often trace back to a failing SSD. See our [blue screen troubleshooting guide](04-blue-screen-troubleshooting.md) for how to identify specific error codes.
4. Your Computer Boots Increasingly Slowly
A healthy SSD should get you to your desktop in seconds. If boot times have been creeping up week over week, especially paired with any of the other symptoms here, your drive may be struggling to read its own boot files.
5. Read-Only Mode or Missing Files
Some failing SSDs will suddenly switch to read-only mode as a self-protective measure, or files and folders you know you saved will simply disappear. This is one of the more urgent warning signs — it usually means the drive controller has detected serious errors.
6. SMART Warnings
Most drives run a background health-monitoring system called S.M.A.R.T. (Self-Monitoring, Analysis, and Reporting Technology). If your computer displays a SMART warning or error, take it seriously — it's the drive itself telling you something is wrong, often before symptoms become severe.
What to Do If You Suspect SSD Failure
1. Back up your data immediately. Don't wait to "see if it gets worse." Copy your important files to an external drive or cloud storage the moment you notice symptoms.
2. Avoid heavy use of the drive.Continuing to write large amounts of data to a failing SSD can accelerate failure and make recovery harder.
3. Don't attempt DIY recovery tools on a severely failing drive without understanding the risks — some recovery attempts can overwrite recoverable data.
4. Get a professional diagnosis f the drive contains anything you can't afford to lose.
If the drive has already failed and you're missing critical files, see our guide on [data recovery after drive failure](09-data-recovery-after-drive-failure.md).
When to Call a Professional
- SSD failure timelines can be unpredictable — some drives limp along for months, others fail within days of the first symptom. If you're seeing any combination of the signs above, it's better to act early.
**Home Net Computers** helps customers across Seattle, Bellevue, Tacoma, and the surrounding area diagnose failing drives and recover data before it's too late. Call **206-478-5001** or reach out through our contact form — the sooner we look at it, the better your odds of a full recovery.
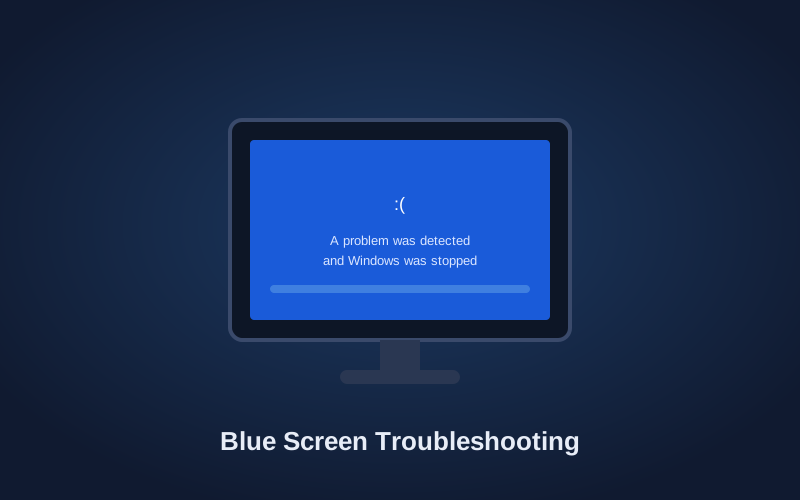
Blue Screen Troubleshooting: What BSOD Errors Actually Mean
The "Blue Screen of Death" (BSOD) has a bad reputation, but it's actually a built-in safety feature — Windows stops itself rather than risk damaging your data further when it hits a serious error. The key to fixing it is figuring out *why* it happened, since a blue screen is a symptom, not the actual problem.
Start With the Error Code
Every blue screen displays a stop code — something like `MEMORY_MANAGEMENT`, `CRITICAL_PROCESS_DIED`, or `DPC_WATCHDOG_VIOLATION`. This code is your single best clue. A few common ones and what they usually point to:
- MEMORY_MANAGEMENT / IRQL_NOT_LESS_OR_EQUAL — often RAM issues, either faulty memory or a driver conflict.
- CRITICAL_PROCESS_DIED — a core Windows process crashed, sometimes due to corrupted system files or a bad update.
- DPC_WATCHDOG_VIOLATION — frequently related to storage drive drivers or a failing SSD.
- VIDEO_TDR_FAILURE — usually points to graphics driver or GPU hardware problems.
- PAGE_FAULT_IN_NONPAGED_AREA — can indicate faulty RAM, driver issues, or disk errors.
Common Causes Behind Blue Screens
1. Driver conflicts — Especially after installing new hardware or updating graphics/chipset drivers. Rolling back a recent driver update often resolves this.
2. Faulty or failing RAM — Windows includes a built-in Memory Diagnostic tool (search "Windows Memory Diagnostic") that can test for this.
3. Failing storage drive — If your SSD or hard drive is developing errors, it can crash the whole system unpredictably. See our guide on [signs your SSD is failing](03-signs-your-ssd-is-failing.md) for related symptoms.
4. Overheating — Components that overheat under load can trigger sudden crashes. This is especially common on laptops — check our [overheating guide](08-laptop-overheating.md).
5. Corrupted system files — Running `sfc /scannow` in an elevated Command Prompt can detect and repair many corrupted Windows files automatically.
6. Recent software or Windows updates — If the crashes started right after an update, that update is a prime suspect.
Basic Troubleshooting Steps
1. Write down the stop code the next time it happens — this narrows the search dramatically.
2. Check Reliability Monitor (search for it in Windows) to see a timeline of crashes and what else happened around the same time.
3. Update or roll back drivers, particularly graphics and chipset drivers.
4. Run Windows Memory Diagnostic to rule out RAM.
5. Check drive health using built-in tools or manufacturer utilities.
6. Boot into Safe Mode to see if the crashes stop — if they do, something you've installed is likely the cause.
When It's Time to Call a Professional
- If blue screens are happening repeatedly, especially if you've already tried driver updates and basic troubleshooting, the cause may be a genuine hardware fault — failing RAM, a dying drive, or a motherboard issue. Continuing to run a system that's crashing regularly risks further data loss.
**Home Net Computers** diagnoses recurring blue screen issues for customers throughout the Greater Seattle Area, tracing the problem back to its actual root cause instead of just patching symptoms. Call **206-478-5001** or reach out through our contact form for a proper diagnosis.
- MEMORY_MANAGEMENT / IRQL_NOT_LESS_OR_EQUAL — often RAM issues, either faulty memory or a driver conflict.
Gaming PC Buying Guide: What Actually Matters
Shopping for a gaming PC can feel overwhelming — endless spec sheets, conflicting advice online, and marketing language designed to make every option sound like the best one. Here's a grounded look at what actually determines gaming performance, so you can make a decision based on how you'll actually use the machine.
Start With How You'll Use It
Before looking at specs, get clear on your actual use case:
- Competitive/esports gaming (Valorant, CS2, Overwatch) — prioritizes high frame rates over maximum graphical fidelity. A strong CPU and mid-range GPU often outperform an expensive GPU paired with a weak CPU.
- AAA/graphically demanding games (Cyberpunk-style titles, flight sims) — leans more heavily on GPU power and VRAM.
- Streaming while gaming — benefits from a stronger CPU (more cores) to handle encoding alongside the game itself.
- Content creation plus gaming — benefits from more RAM, faster storage, and a capable CPU in addition to the GPU.
The Components That Matter Most
- Graphics Card (GPU) — Usually the single biggest factor in gaming performance. Match the GPU tier to the resolution and frame rate you're targeting (1080p, 1440p, or 4K).
- Processor (CPU) — Matters more than people expect, especially for competitive games and high frame rates. A powerful GPU paired with a weak CPU will "bottleneck," meaning the GPU sits underused.
- RAM — 16GB is a reasonable baseline for most current games; 32GB provides headroom for multitasking, streaming, or future titles.
- Storage — An SSD (ideally NVMe) is essentially non-negotiable at this point. It affects load times, install times, and overall system responsiveness far more than most people expect.
- Power Supply (PSU) — Often overlooked, but a quality PSU protects every other component. Skimping here is a false economy.
- Cooling — Sustained performance under load depends on adequate cooling. A system that throttles due to heat won't deliver the performance its specs suggest.
Custom Build vs. Prebuilt
- Both paths can be reasonable depending on your priorities — budget, timeline, and how much you value having a system built specifically around your use case. We cover this tradeoff in detail in our [custom PC vs. prebuilt guide](06-custom-pc-vs-prebuilt.md).
Common Mistakes to Avoid
- Overspending on the GPU while underspending on the CPU, creating a bottleneck.
- Ignoring the power supply's quality and wattage headroom — a marginal PSU can cause instability or even damage components.
- Skipping proper cooling to save money, then getting disappointing real-world performance.
- Buying based on marketing terms alone rather than understanding what a build is actually optimized for.
Getting a Build That Fits You, Not a Spec Sheet
- The best gaming PC isn't the one with the highest numbers on paper — it's the one built around the games you actually play, your budget, and your plans for the next few years. A one-on-one conversation about your goals often leads to a smarter, more cost-effective build than simply chasing the highest-rated components.
**Home Net Computers** builds custom gaming PCs for clients throughout the Greater Seattle Area, starting with a real conversation about how you'll use the machine — not a generic package. Call **206-478-5001** or reach out through our contact form to talk through what makes sense for you.
- Competitive/esports gaming (Valorant, CS2, Overwatch) — prioritizes high frame rates over maximum graphical fidelity. A strong CPU and mid-range GPU often outperform an expensive GPU paired with a weak CPU.
Custom PC vs. Prebuilt: Which Is Right for You?
One of the first decisions anyone shopping for a new gaming or performance PC faces is whether to buy a prebuilt system or have one custom-built. There's no universally "correct" answer — it depends on your priorities. Here's an honest look at the tradeoffs.
Prebuilt Systems: The Case For
- Convenience — available immediately from retailers, no build time required.
- Predictable pricing — the price on the box is the price you pay.
- Warranty simplicity — typically one manufacturer warranty covering the whole system.
Prebuilt Systems: The Tradeoffs
- Component compromises — manufacturers often pair a strong-looking GPU with a weaker power supply, less efficient cooling, or a case with poor airflow to hit a price point.
- Limited upgradability — proprietary parts, non-standard case sizes, or motherboards with limited expansion can make future upgrades difficult.
- One-size-fits-all specs — built for a general audience, not your specific use case (streaming, competitive gaming, creative work).
- Cable management and airflow — often an afterthought in mass-produced systems, which can affect long-term thermals and component lifespan.
Custom-Built Systems: The Case For
- Built around your actual use case — a conversation about how you'll use the machine informs every component choice, rather than fitting you into a pre-made package.
- Component-by-component quality control — no hidden compromises on the power supply, cooling, or case airflow to hit a marketing price point.
- Better long-term scalability — a system built with upgrades in mind can grow with you instead of hitting a wall in a year or two.
- Clean builds — proper cable management and airflow planning contribute to both aesthetics and component longevity.
- Direct accountability — when the person who built your system is the same person you call for support, there's no finger-pointing between manufacturer and retailer.
Custom-Built Systems: The Tradeoffs
- Slightly longer lead time than buying off the shelf.
- Requires a conversation upfront about your needs and budget — a small time investment that typically pays off in a better-fitting system.
A Simple Way to Decide
Ask yourself:
- Do I need this today, or can I wait a few days to a week for a build tailored to me?
- Do I have a specific use case (competitive gaming, streaming, content creation, CAD) that a generic prebuilt might not be optimized for?
- Do I care about future upgradability, or am I fine replacing the whole system in a few years?
- Would I rather work with one person who knows my exact system, or navigate a manufacturer's support line if something goes wrong?
If you value long-term value, a system tailored to exactly how you'll use it, and a direct relationship with the person who built it, a custom build is usually the stronger investment. If speed and simplicity matter most, a reputable prebuilt can still be a reasonable choice.
Our Approach to Custom Builds
- Every custom system starts with a real conversation — not a template. We ask what you'll actually be doing with the machine, then engineer the build around that: component selection, cooling, cable management, and future scalability, all considered from the ground up.
**Home Net Computers** has been building custom PCs for clients throughout the Greater Seattle Area since 2003. Call **206-478-5001** or reach out through our contact form to talk through what a custom build could look like for you.
- Convenience — available immediately from retailers, no build time required.
Blue Screen Troubleshooting: What BSOD Errors Actually Mean
The "Blue Screen of Death" (BSOD) has a bad reputation, but it's actually a built-in safety feature — Windows stops itself rather than risk damaging your data further when it hits a serious error. The key to fixing it is figuring out *why* it happened, since a blue screen is a symptom, not the actual problem.
Start With the Error Code
Every blue screen displays a stop code — something like `MEMORY_MANAGEMENT`, `CRITICAL_PROCESS_DIED`, or `DPC_WATCHDOG_VIOLATION`. This code is your single best clue. A few common ones and what they usually point to:
- MEMORY_MANAGEMENT / IRQL_NOT_LESS_OR_EQUAL — often RAM issues, either faulty memory or a driver conflict.
- CRITICAL_PROCESS_DIED — a core Windows process crashed, sometimes due to corrupted system files or a bad update.
- DPC_WATCHDOG_VIOLATION — frequently related to storage drive drivers or a failing SSD.
- VIDEO_TDR_FAILURE — usually points to graphics driver or GPU hardware problems.
- PAGE_FAULT_IN_NONPAGED_AREA — can indicate faulty RAM, driver issues, or disk errors.
Common Causes Behind Blue Screens
1. Driver conflicts — Especially after installing new hardware or updating graphics/chipset drivers. Rolling back a recent driver update often resolves this.
2. Faulty or failing RAM — Windows includes a built-in Memory Diagnostic tool (search "Windows Memory Diagnostic") that can test for this.
3. Failing storage drive — If your SSD or hard drive is developing errors, it can crash the whole system unpredictably. See our guide on [signs your SSD is failing](03-signs-your-ssd-is-failing.md) for related symptoms.
4. Overheating — Components that overheat under load can trigger sudden crashes. This is especially common on laptops — check our [overheating guide](08-laptop-overheating.md).
5. Corrupted system files — Running `sfc /scannow` in an elevated Command Prompt can detect and repair many corrupted Windows files automatically.
6. Recent software or Windows updates — If the crashes started right after an update, that update is a prime suspect.
Basic Troubleshooting Steps
1. Write down the stop code the next time it happens — this narrows the search dramatically.
2. Check Reliability Monitor (search for it in Windows) to see a timeline of crashes and what else happened around the same time.
3. Update or roll back drivers, particularly graphics and chipset drivers.
4. Run Windows Memory Diagnostic to rule out RAM.
5. Check drive health using built-in tools or manufacturer utilities.
6. Boot into Safe Mode to see if the crashes stop — if they do, something you've installed is likely the cause.
When It's Time to Call a Professional
- If blue screens are happening repeatedly, especially if you've already tried driver updates and basic troubleshooting, the cause may be a genuine hardware fault — failing RAM, a dying drive, or a motherboard issue. Continuing to run a system that's crashing regularly risks further data loss.
**Home Net Computers** diagnoses recurring blue screen issues for customers throughout the Greater Seattle Area, tracing the problem back to its actual root cause instead of just patching symptoms. Call **206-478-5001** or reach out through our contact form for a proper diagnosis.
- MEMORY_MANAGEMENT / IRQL_NOT_LESS_OR_EQUAL — often RAM issues, either faulty memory or a driver conflict.
Gaming PC Buying Guide: What Actually Matters
Shopping for a gaming PC can feel overwhelming — endless spec sheets, conflicting advice online, and marketing language designed to make every option sound like the best one. Here's a grounded look at what actually determines gaming performance, so you can make a decision based on how you'll actually use the machine.
Start With How You'll Use It
Before looking at specs, get clear on your actual use case:
- Competitive/esports gaming (Valorant, CS2, Overwatch) — prioritizes high frame rates over maximum graphical fidelity. A strong CPU and mid-range GPU often outperform an expensive GPU paired with a weak CPU.
- AAA/graphically demanding games (Cyberpunk-style titles, flight sims) — leans more heavily on GPU power and VRAM.
- Streaming while gaming — benefits from a stronger CPU (more cores) to handle encoding alongside the game itself.
- Content creation plus gaming — benefits from more RAM, faster storage, and a capable CPU in addition to the GPU.
The Components That Matter Most
- Graphics Card (GPU) — Usually the single biggest factor in gaming performance. Match the GPU tier to the resolution and frame rate you're targeting (1080p, 1440p, or 4K).
- Processor (CPU) — Matters more than people expect, especially for competitive games and high frame rates. A powerful GPU paired with a weak CPU will "bottleneck," meaning the GPU sits underused.
- RAM — 16GB is a reasonable baseline for most current games; 32GB provides headroom for multitasking, streaming, or future titles.
- Storage — An SSD (ideally NVMe) is essentially non-negotiable at this point. It affects load times, install times, and overall system responsiveness far more than most people expect.
- Power Supply (PSU) — Often overlooked, but a quality PSU protects every other component. Skimping here is a false economy.
- Cooling — Sustained performance under load depends on adequate cooling. A system that throttles due to heat won't deliver the performance its specs suggest.
Custom Build vs. Prebuilt
- Both paths can be reasonable depending on your priorities — budget, timeline, and how much you value having a system built specifically around your use case. We cover this tradeoff in detail in our [custom PC vs. prebuilt guide](06-custom-pc-vs-prebuilt.md).
Common Mistakes to Avoid
- Overspending on the GPU while underspending on the CPU, creating a bottleneck.
- Ignoring the power supply's quality and wattage headroom — a marginal PSU can cause instability or even damage components.
- Skipping proper cooling to save money, then getting disappointing real-world performance.
- Buying based on marketing terms alone rather than understanding what a build is actually optimized for.
Getting a Build That Fits You, Not a Spec Sheet
- The best gaming PC isn't the one with the highest numbers on paper — it's the one built around the games you actually play, your budget, and your plans for the next few years. A one-on-one conversation about your goals often leads to a smarter, more cost-effective build than simply chasing the highest-rated components.
**Home Net Computers** builds custom gaming PCs for clients throughout the Greater Seattle Area, starting with a real conversation about how you'll use the machine — not a generic package. Call **206-478-5001** or reach out through our contact form to talk through what makes sense for you.
- Competitive/esports gaming (Valorant, CS2, Overwatch) — prioritizes high frame rates over maximum graphical fidelity. A strong CPU and mid-range GPU often outperform an expensive GPU paired with a weak CPU.
Custom PC vs. Prebuilt: Which Is Right for You?
One of the first decisions anyone shopping for a new gaming or performance PC faces is whether to buy a prebuilt system or have one custom-built. There's no universally "correct" answer — it depends on your priorities. Here's an honest look at the tradeoffs.
Prebuilt Systems: The Case For
- Convenience — available immediately from retailers, no build time required.
- Predictable pricing — the price on the box is the price you pay.
- Warranty simplicity — typically one manufacturer warranty covering the whole system.
Prebuilt Systems: The Tradeoffs
- Component compromises — manufacturers often pair a strong-looking GPU with a weaker power supply, less efficient cooling, or a case with poor airflow to hit a price point.
- Limited upgradability — proprietary parts, non-standard case sizes, or motherboards with limited expansion can make future upgrades difficult.
- One-size-fits-all specs — built for a general audience, not your specific use case (streaming, competitive gaming, creative work).
- Cable management and airflow — often an afterthought in mass-produced systems, which can affect long-term thermals and component lifespan.
Custom-Built Systems: The Case For
- Built around your actual use case — a conversation about how you'll use the machine informs every component choice, rather than fitting you into a pre-made package.
- Component-by-component quality control — no hidden compromises on the power supply, cooling, or case airflow to hit a marketing price point.
- Better long-term scalability — a system built with upgrades in mind can grow with you instead of hitting a wall in a year or two.
- Clean builds — proper cable management and airflow planning contribute to both aesthetics and component longevity.
- Direct accountability — when the person who built your system is the same person you call for support, there's no finger-pointing between manufacturer and retailer.
Custom-Built Systems: The Tradeoffs
- Slightly longer lead time than buying off the shelf.
- Requires a conversation upfront about your needs and budget — a small time investment that typically pays off in a better-fitting system.
A Simple Way to Decide
Ask yourself:
- Do I need this today, or can I wait a few days to a week for a build tailored to me?
- Do I have a specific use case (competitive gaming, streaming, content creation, CAD) that a generic prebuilt might not be optimized for?
- Do I care about future upgradability, or am I fine replacing the whole system in a few years?
- Would I rather work with one person who knows my exact system, or navigate a manufacturer's support line if something goes wrong?
If you value long-term value, a system tailored to exactly how you'll use it, and a direct relationship with the person who built it, a custom build is usually the stronger investment. If speed and simplicity matter most, a reputable prebuilt can still be a reasonable choice.
Our Approach to Custom Builds
- Every custom system starts with a real conversation — not a template. We ask what you'll actually be doing with the machine, then engineer the build around that: component selection, cooling, cable management, and future scalability, all considered from the ground up.
**Home Net Computers** has been building custom PCs for clients throughout the Greater Seattle Area since 2003. Call **206-478-5001** or reach out through our contact form to talk through what a custom build could look like for you.
- Convenience — available immediately from retailers, no build time required.
Windows 11 Optimization: Getting the Most Out of Your PC
Windows 11 runs well on modern hardware out of the box, but a few adjustments can noticeably improve speed, responsiveness, and battery life (for laptops) without spending a dime on new parts. Here's where to focus.
1. Trim Your Startup Programs
Every program that launches automatically at startup adds to your boot time and consumes background resources.
- Open **Task Manager** (Ctrl+Shift+Esc) and click the **Startup apps** tab.
- Disable anything you don't need running the moment you log in — you can always open it manually later.
2. Check for Background Apps Eating Resources
- Under **Settings > Apps > Installed apps**, you can see what's installed, and under **Settings > Privacy & security > Background apps**, you can control what's allowed to run silently in the background.
3. Keep Windows and Drivers Updated
- Performance and stability improvements ship regularly through Windows Update and manufacturer driver updates (especially graphics drivers). Outdated drivers are a common, overlooked source of sluggishness and instability — see our [blue screen troubleshooting guide](04-blue-screen-troubleshooting.md) for how driver issues can escalate into bigger problems.
4. Manage Visual Effects
- Windows 11's animations and transparency effects look nice but use system resources. On lower-spec hardware, adjusting these can free up noticeable performance:
- Search **"Adjust the appearance and performance of Windows"** in the Start menu.
- Choose **"Adjust for best performance"**, or manually disable specific effects while keeping the ones you like.
5. Check Storage Health and Free Space
- A drive running low on free space (especially below 10-15%) can slow the whole system down, since Windows needs breathing room for temporary files and virtual memory. Use **Storage Sense** (Settings > System > Storage) to automatically clean up temporary files.
6. Review What's Running at Full Power
- Task Manager's** Processes tab (sorted by CPU or Memory) will quickly show you if something unexpected is consuming resources. If you find something unfamiliar using significant resources consistently, it's worth investigating further — it could be a legitimate background process or, in rarer cases, something malicious.
7. Consider Your Power Plan (Laptops)
- Windows 11's power mode settings (Settings > System > Power & battery) let you balance between performance and battery life. If your laptop feels sluggish, check that it isn't set to a battery-saving mode while plugged in.
8. Don't Overlook Hardware Limits
- Software optimization can only do so much. If your system is consistently maxed out on CPU, RAM, or storage during normal use, that's a sign the hardware itself may need an upgrade rather than another tweak. See our guide on [Windows 11 optimization vs. hardware upgrades] — sometimes more RAM or a faster SSD delivers a bigger improvement than any settings change.
When Software Tweaks Aren't Enough
- If you've gone through these steps and your system still feels slow, the bottleneck is likely hardware-related — an aging hard drive, insufficient RAM, or a CPU that's simply reached its limit for modern workloads.
**Home Net Computers** helps clients throughout the Greater Seattle Area get the most out of their existing systems, and advises honestly on when an upgrade — rather than another software tweak — is the better investment. Call **206-478-5001** or reach out through our contact form for a tune-up.
- Open **Task Manager** (Ctrl+Shift+Esc) and click the **Startup apps** tab.
Laptop Overheating: Causes, Fixes, and When to Worry
Laptops pack powerful components into a compact, thermally challenging space — so some warmth during heavy use is completely normal. But if your laptop is getting hot to the touch, shutting down unexpectedly, or throttling performance noticeably, it's worth addressing before it causes lasting damage.
Common Causes of Overheating
1. Dust buildup — Over time, dust accumulates in fans and heat sinks, blocking airflow. This is the single most common cause of overheating in laptops more than a year or two old.
2. Blocked vents — Using a laptop on a soft surface like a bed or couch can block intake vents underneath, trapping heat that would otherwise escape.
3. Dried-out thermal paste — The thermal paste between the CPU/GPU and their heat sinks degrades over several years, reducing heat transfer efficiency.
4. Demanding workloads — Gaming, video editing, or running multiple resource-heavy applications simultaneously naturally generates more heat than everyday browsing.
5. Background processes running unnecessarily — Malware or poorly optimized background applications can push your CPU to run harder than it needs to, generating excess heat even during "light" use.
6. Aging battery — In some cases, a swelling or degrading battery can contribute to internal heat buildup and should be inspected.
Signs Your Laptop Is Overheating
- Fans running loudly and constantly, even during light tasks.
- The bottom or keyboard area becoming uncomfortably hot to the touch.
- Performance dropping noticeably during extended use (this is called "thermal throttling" — the system slows itself down to avoid damage).
- Random shutdowns or restarts, especially during demanding tasks.
- Blue screen errors that seem to correlate with heavy use — see our [blue screen troubleshooting guide](04-blue-screen-troubleshooting.md).
What You Can Do
1. Use it on a hard, flat surface to keep vents unobstructed — a laptop cooling pad or stand can help significantly.
2. Clean the vents with compressed air, focusing on visible dust buildup around fan exhausts.
3. Check Task Manager for unexpected processes consuming high CPU while the laptop is otherwise idle.
4. Monitor temperatures using free tools designed for this purpose, if you want concrete numbers rather than guesswork.
5. Avoid extended use on battery in high-performance mode if the laptop already runs hot — this compounds heat buildup in a sealed chassis.
What Requires Professional Attention
- Internal cleaning (opening the chassis to clean fans and heat sinks directly) and thermal paste replacement typically require disassembly that varies significantly between laptop models — and doing it incorrectly can risk damaging delicate components or voiding a warranty. If basic external cleaning and surface changes haven't resolved the issue, an internal cleaning and re-pasting is usually the next step.
When to Call a Professional
- Chronic overheating that persists after basic troubleshooting is a sign of internal dust buildup, degraded thermal paste, or in some cases, a failing fan — all of which are best addressed with proper disassembly and the right tools.
**Home Net Computers** provides laptop cleaning, thermal paste replacement, and overheating diagnostics for clients throughout the Greater Seattle Area. Call **206-478-5001** or reach out through our contact form to get your laptop running cool again.
- Fans running loudly and constantly, even during light tasks.
Data Recovery After Drive Failure: What to Do (and What Not to Do)
Discovering that a hard drive or SSD has failed — especially one holding photos, documents, or work files you don't have backed up elsewhere — is stressful. What you do in the first few minutes and hours can significantly affect whether that data is recoverable. Here's how to approach it.
First: Stop Using the Drive
The single most important thing you can do is **stop writing new data to the failing drive immediately**. Every time data is written to a drive — even something as simple as installing a recovery tool onto the same drive — it risks overwriting the very files you're trying to recover.
- Don't install recovery software directly onto the failing drive.
- Don't keep restarting the computer repeatedly, hoping it will "fix itself."
- If it's an external drive, unplug it and set it aside rather than continuing to try opening files from it.
Understand What Kind of Failure You're Dealing With
- Logical failure — The drive is mechanically fine, but something has gone wrong with the file system, partition table, or files themselves (often from corruption, accidental deletion, or a failed update). These cases generally have strong recovery odds.
- Mechanical/hardware failure — The drive itself is physically damaged: clicking sounds, failure to spin up, or the drive not being detected at all by the system's BIOS. These cases are more serious and typically require specialized equipment or a cleanroom environment, particularly for traditional hard drives with moving parts.
- SSD controller failure — Solid state drives fail differently than mechanical drives — there are no moving parts, but a failed controller chip or worn-out memory cells can make data equally difficult to access without specialized tools. See our guide on [signs your SSD is failing](03-signs-your-ssd-is-failing.md) for early warning signs to watch for next time.
Warning Signs You're Dealing With a Serious Failure
- Clicking, grinding, or beeping sounds coming from the drive.
- The drive isn't recognized at all by the computer or BIOS.
- The drive was dropped, exposed to liquid, or physically damaged before symptoms began.
If you notice any of these, **do not attempt DIY recovery software** — running recovery tools on a mechanically failing drive can cause further physical damage and reduce the odds of a successful recovery.
What You Can Try for Minor Logical Issues
- For drives that are still detected by the system but showing file errors or missing data (not physically damaged), reputable data recovery software can sometimes retrieve files — provided you're recovering to a *different* drive, never back onto the failing one.
When to Bring It to a Professional
- The drive makes unusual noises or isn't recognized at all.
- The data is critical enough that a failed DIY attempt isn't an acceptable risk.
- Previous recovery attempts haven't worked.
- You're not fully comfortable with the technical process.
Professional recovery has meaningfully better success rates for anything beyond simple file corruption, particularly for physically damaged drives.
**Home Net Computers** handles data recovery for individuals and small businesses throughout the Greater Seattle Area, with an honest assessment of your recovery odds before any work begins. Call **206-478-5001** or reach out through our contact form as soon as you notice a problem — the sooner we look at it, the better your chances.
- Don't install recovery software directly onto the failing drive.
Windows 11 Optimization: Getting the Most Out of Your PC
Windows 11 runs well on modern hardware out of the box, but a few adjustments can noticeably improve speed, responsiveness, and battery life (for laptops) without spending a dime on new parts. Here's where to focus.
1. Trim Your Startup Programs
Every program that launches automatically at startup adds to your boot time and consumes background resources.
- Open **Task Manager** (Ctrl+Shift+Esc) and click the **Startup apps** tab.
- Disable anything you don't need running the moment you log in — you can always open it manually later.
2. Check for Background Apps Eating Resources
- Under **Settings > Apps > Installed apps**, you can see what's installed, and under **Settings > Privacy & security > Background apps**, you can control what's allowed to run silently in the background.
3. Keep Windows and Drivers Updated
- Performance and stability improvements ship regularly through Windows Update and manufacturer driver updates (especially graphics drivers). Outdated drivers are a common, overlooked source of sluggishness and instability — see our [blue screen troubleshooting guide](04-blue-screen-troubleshooting.md) for how driver issues can escalate into bigger problems.
4. Manage Visual Effects
- Windows 11's animations and transparency effects look nice but use system resources. On lower-spec hardware, adjusting these can free up noticeable performance:
- Search **"Adjust the appearance and performance of Windows"** in the Start menu.
- Choose **"Adjust for best performance"**, or manually disable specific effects while keeping the ones you like.
5. Check Storage Health and Free Space
- A drive running low on free space (especially below 10-15%) can slow the whole system down, since Windows needs breathing room for temporary files and virtual memory. Use **Storage Sense** (Settings > System > Storage) to automatically clean up temporary files.
6. Review What's Running at Full Power
- Task Manager's** Processes tab (sorted by CPU or Memory) will quickly show you if something unexpected is consuming resources. If you find something unfamiliar using significant resources consistently, it's worth investigating further — it could be a legitimate background process or, in rarer cases, something malicious.
7. Consider Your Power Plan (Laptops)
- Windows 11's power mode settings (Settings > System > Power & battery) let you balance between performance and battery life. If your laptop feels sluggish, check that it isn't set to a battery-saving mode while plugged in.
8. Don't Overlook Hardware Limits
- Software optimization can only do so much. If your system is consistently maxed out on CPU, RAM, or storage during normal use, that's a sign the hardware itself may need an upgrade rather than another tweak. See our guide on [Windows 11 optimization vs. hardware upgrades] — sometimes more RAM or a faster SSD delivers a bigger improvement than any settings change.
When Software Tweaks Aren't Enough
- If you've gone through these steps and your system still feels slow, the bottleneck is likely hardware-related — an aging hard drive, insufficient RAM, or a CPU that's simply reached its limit for modern workloads.
**Home Net Computers** helps clients throughout the Greater Seattle Area get the most out of their existing systems, and advises honestly on when an upgrade — rather than another software tweak — is the better investment. Call **206-478-5001** or reach out through our contact form for a tune-up.
- Open **Task Manager** (Ctrl+Shift+Esc) and click the **Startup apps** tab.
Laptop Overheating: Causes, Fixes, and When to Worry
Laptops pack powerful components into a compact, thermally challenging space — so some warmth during heavy use is completely normal. But if your laptop is getting hot to the touch, shutting down unexpectedly, or throttling performance noticeably, it's worth addressing before it causes lasting damage.
Common Causes of Overheating
1. Dust buildup — Over time, dust accumulates in fans and heat sinks, blocking airflow. This is the single most common cause of overheating in laptops more than a year or two old.
2. Blocked vents — Using a laptop on a soft surface like a bed or couch can block intake vents underneath, trapping heat that would otherwise escape.
3. Dried-out thermal paste — The thermal paste between the CPU/GPU and their heat sinks degrades over several years, reducing heat transfer efficiency.
4. Demanding workloads — Gaming, video editing, or running multiple resource-heavy applications simultaneously naturally generates more heat than everyday browsing.
5. Background processes running unnecessarily — Malware or poorly optimized background applications can push your CPU to run harder than it needs to, generating excess heat even during "light" use.
6. Aging battery — In some cases, a swelling or degrading battery can contribute to internal heat buildup and should be inspected.
Signs Your Laptop Is Overheating
- Fans running loudly and constantly, even during light tasks.
- The bottom or keyboard area becoming uncomfortably hot to the touch.
- Performance dropping noticeably during extended use (this is called "thermal throttling" — the system slows itself down to avoid damage).
- Random shutdowns or restarts, especially during demanding tasks.
- Blue screen errors that seem to correlate with heavy use — see our [blue screen troubleshooting guide](04-blue-screen-troubleshooting.md).
What You Can Do
1. Use it on a hard, flat surface to keep vents unobstructed — a laptop cooling pad or stand can help significantly.
2. Clean the vents with compressed air, focusing on visible dust buildup around fan exhausts.
3. Check Task Manager for unexpected processes consuming high CPU while the laptop is otherwise idle.
4. Monitor temperatures using free tools designed for this purpose, if you want concrete numbers rather than guesswork.
5. Avoid extended use on battery in high-performance mode if the laptop already runs hot — this compounds heat buildup in a sealed chassis.
What Requires Professional Attention
- Internal cleaning (opening the chassis to clean fans and heat sinks directly) and thermal paste replacement typically require disassembly that varies significantly between laptop models — and doing it incorrectly can risk damaging delicate components or voiding a warranty. If basic external cleaning and surface changes haven't resolved the issue, an internal cleaning and re-pasting is usually the next step.
When to Call a Professional
- Chronic overheating that persists after basic troubleshooting is a sign of internal dust buildup, degraded thermal paste, or in some cases, a failing fan — all of which are best addressed with proper disassembly and the right tools.
**Home Net Computers** provides laptop cleaning, thermal paste replacement, and overheating diagnostics for clients throughout the Greater Seattle Area. Call **206-478-5001** or reach out through our contact form to get your laptop running cool again.
- Fans running loudly and constantly, even during light tasks.
Data Recovery After Drive Failure: What to Do (and What Not to Do)
Discovering that a hard drive or SSD has failed — especially one holding photos, documents, or work files you don't have backed up elsewhere — is stressful. What you do in the first few minutes and hours can significantly affect whether that data is recoverable. Here's how to approach it.
First: Stop Using the Drive
The single most important thing you can do is **stop writing new data to the failing drive immediately**. Every time data is written to a drive — even something as simple as installing a recovery tool onto the same drive — it risks overwriting the very files you're trying to recover.
- Don't install recovery software directly onto the failing drive.
- Don't keep restarting the computer repeatedly, hoping it will "fix itself."
- If it's an external drive, unplug it and set it aside rather than continuing to try opening files from it.
Understand What Kind of Failure You're Dealing With
- Logical failure — The drive is mechanically fine, but something has gone wrong with the file system, partition table, or files themselves (often from corruption, accidental deletion, or a failed update). These cases generally have strong recovery odds.
- Mechanical/hardware failure — The drive itself is physically damaged: clicking sounds, failure to spin up, or the drive not being detected at all by the system's BIOS. These cases are more serious and typically require specialized equipment or a cleanroom environment, particularly for traditional hard drives with moving parts.
- SSD controller failure — Solid state drives fail differently than mechanical drives — there are no moving parts, but a failed controller chip or worn-out memory cells can make data equally difficult to access without specialized tools. See our guide on [signs your SSD is failing](03-signs-your-ssd-is-failing.md) for early warning signs to watch for next time.
Warning Signs You're Dealing With a Serious Failure
- Clicking, grinding, or beeping sounds coming from the drive.
- The drive isn't recognized at all by the computer or BIOS.
- The drive was dropped, exposed to liquid, or physically damaged before symptoms began.
If you notice any of these, **do not attempt DIY recovery software** — running recovery tools on a mechanically failing drive can cause further physical damage and reduce the odds of a successful recovery.
What You Can Try for Minor Logical Issues
- For drives that are still detected by the system but showing file errors or missing data (not physically damaged), reputable data recovery software can sometimes retrieve files — provided you're recovering to a *different* drive, never back onto the failing one.
When to Bring It to a Professional
- The drive makes unusual noises or isn't recognized at all.
- The data is critical enough that a failed DIY attempt isn't an acceptable risk.
- Previous recovery attempts haven't worked.
- You're not fully comfortable with the technical process.
Professional recovery has meaningfully better success rates for anything beyond simple file corruption, particularly for physically damaged drives.
**Home Net Computers** handles data recovery for individuals and small businesses throughout the Greater Seattle Area, with an honest assessment of your recovery odds before any work begins. Call **206-478-5001** or reach out through our contact form as soon as you notice a problem — the sooner we look at it, the better your chances.
- Don't install recovery software directly onto the failing drive.
CONTACT OUR TEAM TODAY
Fill out the form below to contact Home Net Computers. We look forward to speaking with you.

Sign up to our newsletter
Thank you for contacting us.
We will get back to you as soon as possible.
Oops, there was an error in sending your message.
Please try again later.

